There’s something timeless and comforting about a homemade cherry pie.
Whether you’re looking to impress guests at a garden lunch or simply treat yourself on a quiet evening with a hot cup of tea, this pie delivers every time.
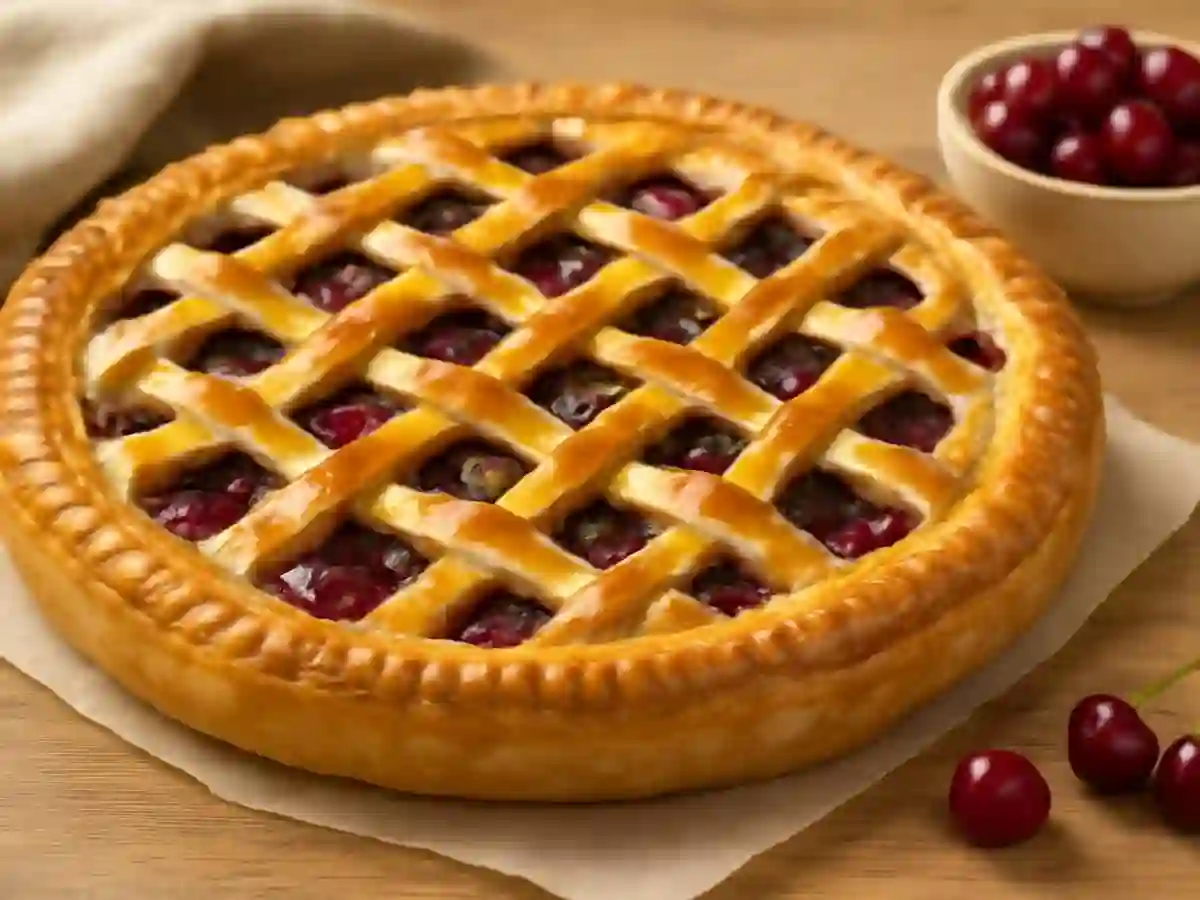
The combination of crisp, buttery layers and that juicy, slightly tart cherry filling is the definition of pure joy.
And the best part? You don’t need to be a pastry pro to pull it off.
This recipe keeps things approachable—even if it’s your first time working with laminated dough.
Pick Your Cherries, Fresh or Frozen
In the summer, nothing beats the flavor of fresh cherries—sweet, tart, and incredibly fragrant. But don’t worry if they’re out of season.
Frozen cherries are just as good as long as you drain off the extra juice.
Want to add a little flair? Try a pinch of cinnamon or a sprinkle of crushed almonds for a richer taste.
Ingredients for a Cherry Pie That Serves 8
Dough:
-
250 g all-purpose flour
-
180 g unsalted butter
-
150 ml cold water
-
1 egg
-
⅓ tsp salt
-
½ tsp lemon juice
Filling:
-
400 g pitted cherries (fresh or frozen)
-
4 tbsp granulated sugar
-
1.5 tbsp cornstarch
-
1 tsp vanilla sugar
-
1 egg (for brushing the top)
Let’s Get Baking Step-by-Step
Step 1: Start With the Dough
Whisk together the egg, 100 ml of water, lemon juice, and salt.
Mix into the sifted flour and knead gently until the dough is smooth and soft.
Shape it into a ball, cover it with a towel, and let it rest for 20 minutes.
Step 2: Prep the Butter Block
Slice the butter and leave it at room temperature for 30 minutes.
Mix it with a tablespoon or two of flour until smooth, then place it in the freezer for half an hour.
Step 3: Encase the Butter
Roll your dough into a 40×30 cm rectangle. Lay thin pieces of chilled butter across it.
Fold the dough like an envelope over the butter and pinch the edges closed to trap it inside.
Step 4: Create Those Beautiful Layers
Fold the dough into four sections like a letter and refrigerate it for 20 minutes.
Repeat the rolling, folding, and chilling three more times to build up those flaky layers we all love.
Step 5: Mix the Filling
If your cherries are frozen, thaw and drain them first.
Toss them with the sugar, vanilla sugar, and cornstarch, then let the mixture sit for 10 minutes so it thickens slightly.
Step 6: Assemble Your Pie
Split the dough in half. Roll out one piece and place it on a baking tray lined with parchment paper.
Spread the cherry mixture over the center, leaving space around the edges for sealing.
Step 7: Seal and Style
Roll out the second half of the dough. Either cut it into strips for a classic lattice top or keep it whole and cut slits for steam to escape.
Seal the edges, brush with beaten egg, and sprinkle some sugar on top if you like a golden finish.
Step 8: Bake to Perfection
Preheat your oven to 190°C (375°F). Bake the pie for 25–30 minutes, until it’s golden brown and the filling is bubbling slightly.
Let it cool a bit before serving—it’s incredible warm with a scoop of vanilla ice cream or a hot mug of tea.
Final Thought
This cherry pie is more than a dessert—it’s a celebration of simple pleasures.
The kind of treat that brings people together and reminds you why homemade always tastes better.
Whether you’re baking for guests or for yourself, this one is guaranteed to make memories.